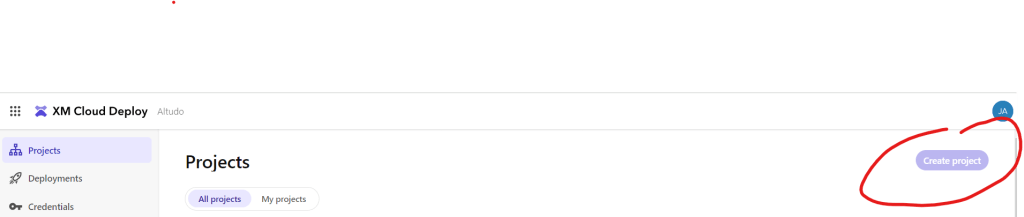
- Create Project giving project name and repository details
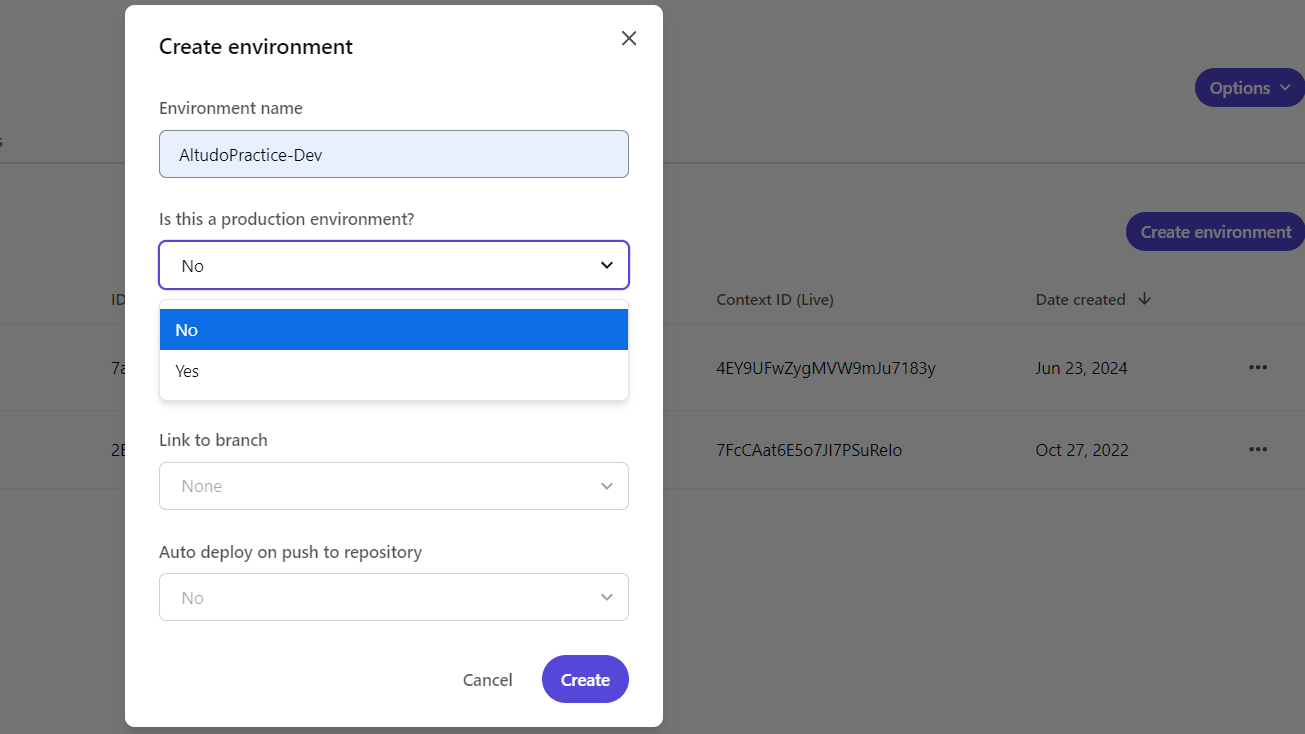
2. Create separate environments within your project as needed. Depending on your subscription, you can set up both production and non-production environments within the project.
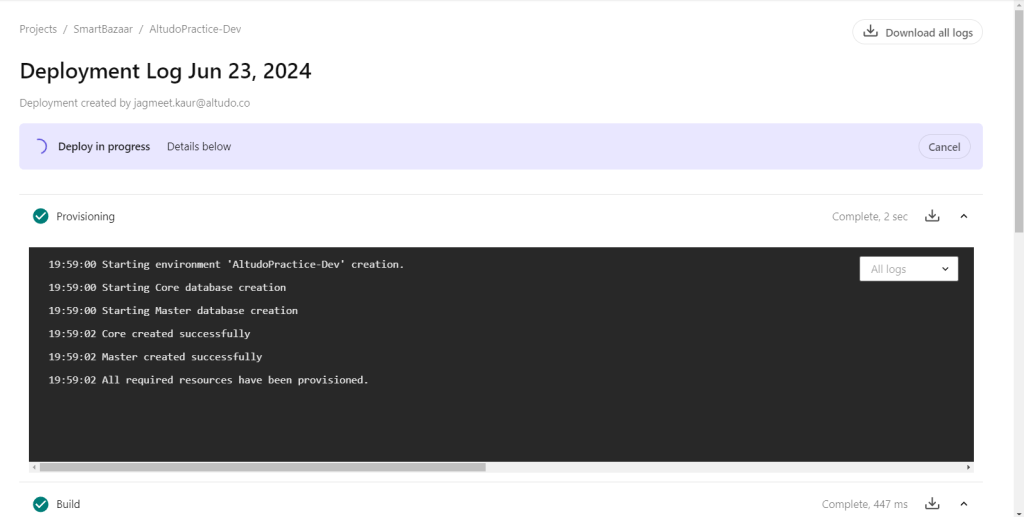
3. Build and deploy app

Check the status of deployments and logs
In the new environment, vanilla version of XM cloud instance will be deployed without any site. You can create your own sites and pages.

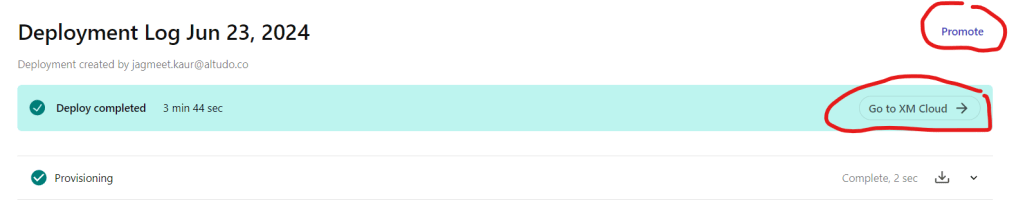
Visit site from deployments. The promote button will move from environment to another. Say, if you are working on UAT branch, after testing, you can promote it to prod.
Login into XM cloud via CLI

Happy Learning, Good luck!

Leave a comment